Sponsor

This project made possible by funding from The West Oxford Agricultural Society ~ presenter of The Fryeburg Fair

Saturday, August 13, 2011

Basic Crochet Pseudosphere Coral Pattern for the Maine Reef

Ok so you want to make something for the reef but, you aren't into free form crochet.
So, you want your piece to look cool and curly like coral can be?
How do you do it?

EASY!

This pattern can give wonderful results simply by changing the yarn size, hook size, using multiple colors or various textures of yarn in the same piece or by simply making the piece larger. Here are some photo examples...


Choose your Yarn and Hook. If you are a beginner, worsted weight smooth yarns with a G hook will make it easier. The textured yarns are nice but can be frustrating to work with. Part of the fun of this project is that there are NO MISTAKES :-)

Have fun and experiment!
Here we go:

- Ch 4 and join to form a circle
- You may work in either sc, dc, or trc. Which ever you choose will
   give you a different look depending on your yarn and hook size       -  work 2 sc, dc OR trc in each ch of the round and continue until you
    reach your desired size
* Changing the increases in the pattern will also change the look. You can try increasing in every other st, every third st or whatever pattern of increase you want. The 2 st per st pattern gives you a pretty curly piece in pretty quick time!

The more rows you do, you will see it exponentially grow. As it does
it curls more and more. AMAZING! And that's it!

  -  Tie off your ends and weave them in.

The white sample is made with worsted weight yarn and G hook. It is the size of an apple.

The orange sample is a contribution from Amy Bertman of Highlands Ranch, CO and is also about the size of an apple and made with worsted weight yarn.
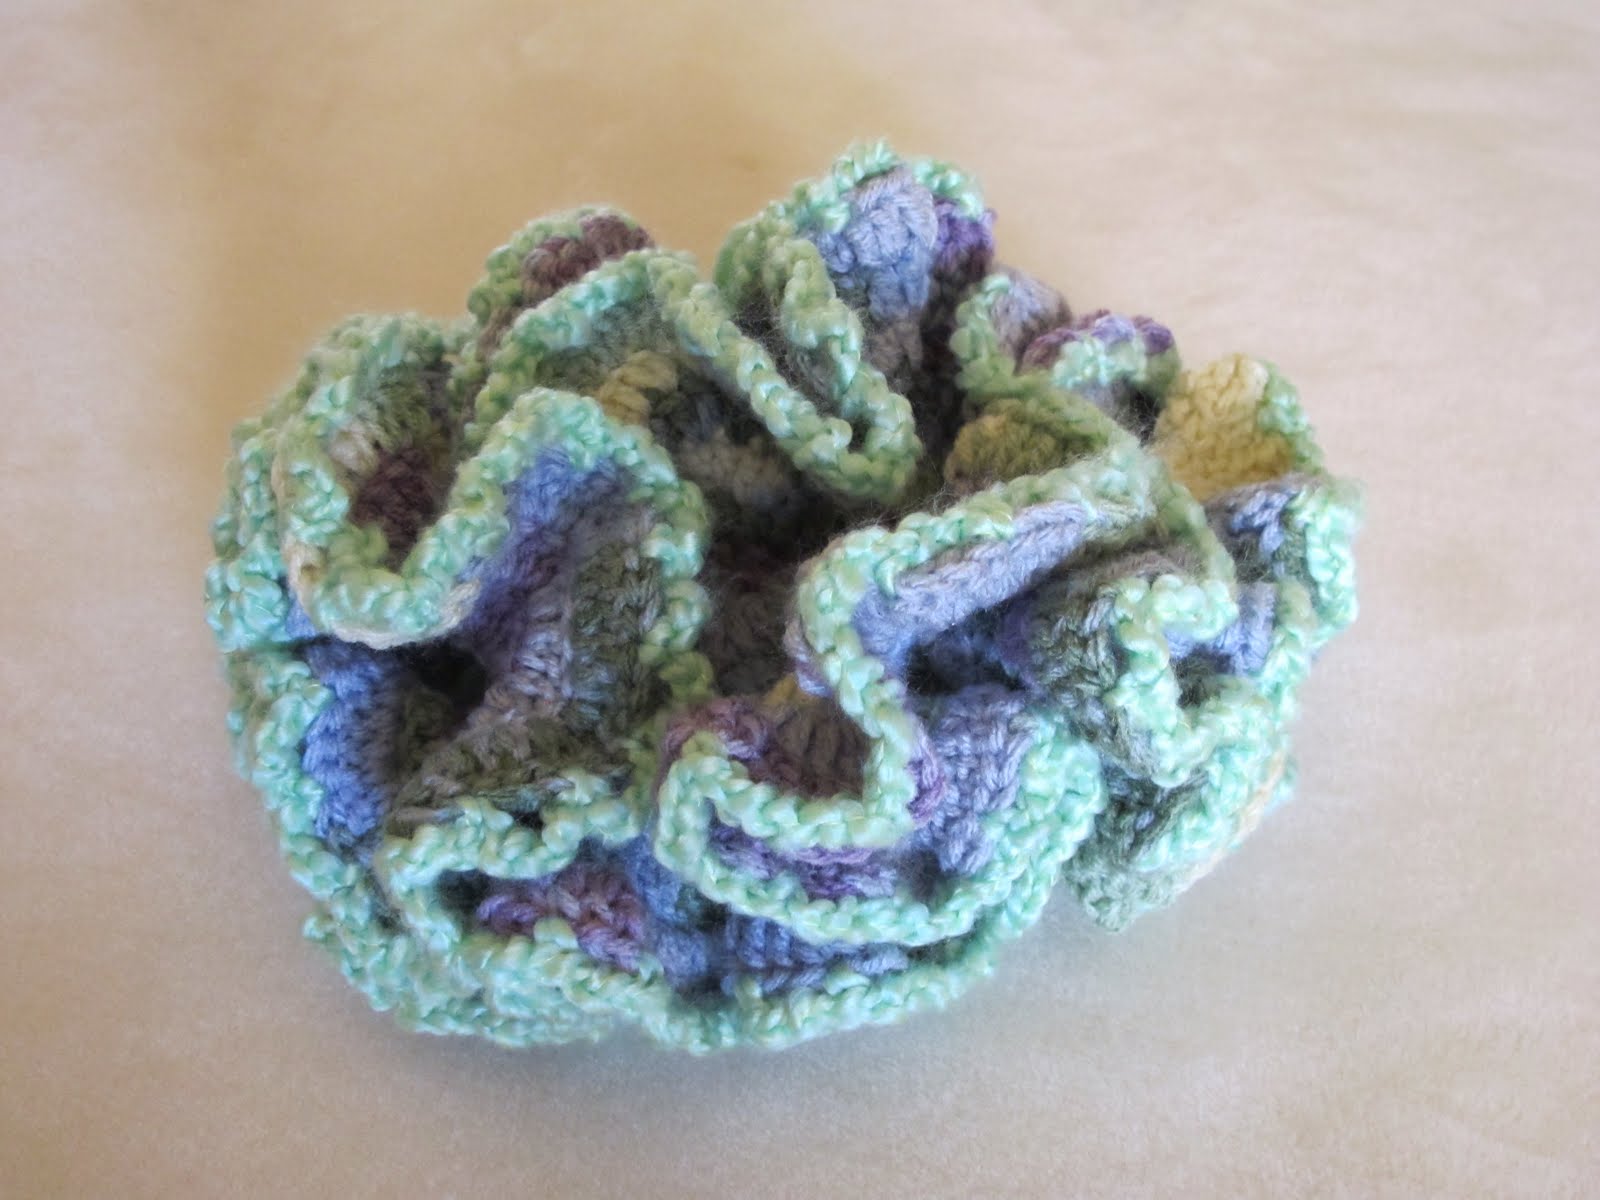
The blue multi sample was done with sock weight yarn and  I think I used a #1 hook. It is smaller than the palm of my  hand and was intended to be turned into a lapel pin or fridge magnet.

 The lilac multi was done with worsted weight yarn and trimmed with Lion Brand Homespun (hard to work with as it gets caught in my needle) using a G hook and is the largest of the pieces at about 9" across.


So go wild!
It's easy, it's fun and uses up any old stash yarn......

                                                      Recycle, repurpose, reuse :-)

Check out my Eco Friendly product line of hand mades called WOOL-RENU™ at my Etsy Shop!  

Thursday, August 11, 2011

Pink Anemone Oasis Pattern for the Maine Crochet Reef Project

Here is my  newest creation and one I was able to keep track of as I made it so I can pass it on to you.
I love this little piece! It stands a little over 8" tall and the base is about 6" across.

As with all of my pieces, I have mostly been using my mom's leftover yarn stash that has been building for years. This is sport weight acrylic baby yarn in pink. The turquoise is also acrylic in worsted weight and the trim is #10 cotton crochet thread.

The anemone's are done using a G hook and the base with a J hook.

Tall Skinny One
- Ch 30 & join to make a circle
- sc in ea st til it measures 1 1/2"
- Dec 3 evenly in the next rnd
- Sc in ea st til it measures 3"
- Dec 3 evenly in the next rnd
- Sc in ea st til it measures 4 1/2"
- Dec 3 evenly in the next rnd
- Sc in ea st til it measures 5 1/2"
- Dec 3 evenly in the next rnd
- Sc in ea st til it measures 6"
- Dec 3 evenly in the next rnd
- Sc in ea st til the piece measures 6 1/2"
- 2 sc in ea outside loop of hte next rnd
- 2 sc in ea sc until it is ruffled as much as you like ( I did 5 rows) and tie off
-  Join the cotton thread and sc in ea st around. You can do 2 in some sts to ease it if you want to.
- Tie off

Mid Sized Fat One

-  Follow directions as for the tall skinny one until the piece measures 4 1/2"
-  pick up the directions just after "measures 6 1/2" in the tall version
- Continue the 2sc in ea st for 5 rows and tie off
-  Finish off with a round of cotton thread as before and tie off

Baby One

- ch 20 st and join to make a ring
-  sc in ea st for 1"
-  Dec 3 evenly in the next rnd
-  Sc til the piece measures 2"
-  Dec 3 evenly in the next rnd
-  Sc til the piece measures 3"
-  sc til the piece measures 4"
-  pick up the directions just after "measures 6 1/2" in the tall version
- Continue the 2sc in ea st for 3 rows and tie off
-  Finish off with a round of cotton thread as before and tie off

The Island
I used worsted weight yarn and a J hook
-  ch 5 and join
-  14 dc in the center and join
-   ch 2, dc in the same space, *dc in the nxt sp, 2dc in the nxt sp* to the end of the rnd
-   Join and ch 2, *3dc in the nxt sp, 1dc in the nxt sp, 2dc in the nxt sp, 1dc in the next sp* repeat to the   
    end of the rnd, join, ch 2 
-   2dc in ea st around and join.
-  ch5, join to the nxt st all around and tie off

Stuff the anemone's lightly with fiber or polyfil and stitch them to the base with matching yarn.

That's it! Good luck.....

Check out my Eco Friendly product line of hand mades called WOOL-RENU™ at my Etsy Shop!  


Tuesday, August 9, 2011

Ravelry Knit and Crochet now has a Maine Reef Group!

New excitement is a brewin' at the Maine Reef!

Last week I contacted Michelle, the organizer for the Hawaiian Satellite Crochet Reef project to say hello and ask for tips and pointers on how she found success in creating their reef. She highly recommended that we begin a group on Ravelry. I've been a Ravelry member for years but have only ever used it for finding patterns so, I decided I'd give it a try.

THESE WOMEN ARE AWESOME! Some Maine crocheters have found us, and other members live in Texas, Michigan, Colorado, and the Hawaiian organizer Michelle has also joined us!  In a few hours we had members who were already beginning to enthusiastically create for our Maine reef. In fact, several have already mailed me some completed pieces!

Here is a FANTASTIC piece of work from Betsey who lives in Coastal Maine. The photo was taken by her friends at her Halcyon spin group.


It has been extremely inspiring and after seeing this piece very humbling to get a glimpse of what this reef will be comprised of.

I hope her work inspires you as it has inspired me! Join the Ravelry Group to see more of her photos and to get in on the Maine Reef action that's taking place there.

Thank you for sharing Betsey...

BTW, Betsey said she had not crocheted in a while and that the Maine Reef project got her going again. That can be you too :-)

Be sure to scroll down to see the most recent postings of basic patterns. After all, not all of us can do what Betsey has done, and that includes most of my work!

Monday, August 8, 2011

Crochet Pseudoshpere Pattern for the Maine Reef

This is posting number two of basic patterns for the Maine Crochet Reef project. Just as simple as the first, and again no need for special yarn or even yardage! How great is that!


Ok so what is a psuedosphere? It's a geometric term for something that looks like the opening of a trumpet as in Lillies and other flowers. Some Coral found in the Great Barrier Reef  has a similar geometry as well and why it is included in the Crochet Reef project.


The pseudosphere on the left is turned upside down to show you the cone like tail. Each of these use the same pattern but with more frequent increases.


Choose your Materials:

YARN: Any leftover yarn made of any fiber. Acrylics will create a more rigid piece and be less expensive and although the Fiber Center usually focuses on natural fibers, the nature, size and scope of this project is allowing the use of any synthetics in addition to natural fibers. Any color can be used and feel free to change colors at any time

HOOK: I recommend using a medium sized  hook, G or H for your first attempts. Any size will work but smaller will be harder for beginners to use if using Worsted weight yarns. If you are using lighter weight yarn, you can use a smaller hook, larger if you are using heavier yarn.  Try different combinations to find what is comfortable for you.


To make the less ruffled piece on the left, follow these simple instructions:


- Chain 15
- 4 sc in the last ch 
- slip st to the 1st sc to form a ring ( you will be left with a tail hanging)
- sc in the round - sc in the next 3 sts, 2 sc in the next st, repeat until the piece is as large as you want it   
  to be. 


To make the more ruffled piece on the right:


- Begin the piece exactly as you do for the less ruffled piece .
- Once you begin to sc in the round, increase in every other stitch instead of every 4th.


That's it! Easy peasy....


The larger you make these, the more ruffled they will be. However the 2nd one will always be more ruffled than the first one. 


Feel free to experiment and use up ends of yarn by changing colors if and when you want to. But most of all, have fun!


Until next time

Check out my Eco Friendly product line of hand mades called WOOL-RENU™ at my Etsy Shop!  

Tuesday, August 2, 2011

Basic Hyperbolic Crochet Patterns

In case you are unsure about how to begin, or if you think you can't do it, think again!

Most of the Reef project will be made up of small pieces. All you need to know is how to chain and single crochet to complete these small and simple pieces. If you don't know how and would like to learn, click on our patterns page and go to the Lions Brand how to crochet video for a great quick study tutorial.

In the first picture are two examples of easy to make hyperbolic planes. The second one shows them photographed together.


 To make the hyperbolic plane on the left in this first photo, follow these simple instructions:

Choose your Materials:

YARN: Any leftover yarn made of any fiber. Acrylics will create a more rigid piece and be less expensive and although the Fiber Center usually focuses on natural fibers, the nature, size and scope of this project is allowing the use of any synthetics in addition to natural fibers. Any color can be used and feel free to change colors at any time

HOOK: I recommend using a medium sized  hook, G or H for your first attempts. Any size will work but smaller will be harder for beginners to use if using Worsted weight yarns. If you are using lighter weight yarn, you can use a smaller hook, larger if you are using heavier yarn.  Try different combinations to find what is comfortable for you.


Pattern:
Row 1: Chain 15.
Row 2: - Begin with a Single crochet in the 3rd chain from the hook.
             - Single crochet in the next 4 stitches.
             - In the next chain, increase a stitch by doing 2 single crochets in the same chain.
             - Single crochet in the next 5 chains and increase in the 6th and repeat  
               to the end of the row ( don't worry when you get the end and don't have enough stitches to  
               do another increase.
             - Chain 2 and turn your work so you can work the next row from right to left
Row 3: - Single crochet in the 2nd single crochet from the hook.
            -  single crochet in the next 4 stitches.
            - In the next chain, increase a stitch by doing 2 single crochets in the same chain.
             - Single crochet in the next 5 chains and increase in the 6th and repeat    
               to the end of the row ( don't worry when you get the end and don't have enough stitches to    
               do another increase.
             - Chain 2 and turn your work so you can work the next row from right to left

Repeat Row 3 until the piece is as big as you want it to be or until you run out of yarn. The piece in the photo is 14 rows and measures about 3" H x 7" W.

Be sure you tie off your end and weave in the tails.

To make the Hyperbolic Plane on the right in the first photo, make it exactly like the first one but, instead of increasing every 6th stitch, increase every 4th stitch.

To make your own Hyperbolic pattern simply change the rate of stitch increases. The more often you increase the more crenelated or curled it will be. The less frequent your increases, the less  curly it will be.

Experiment and have fun! 

Watch for other patterns to come soon......

Until next time........

Check out my Eco Friendly product line of hand mades called WOOL-RENU™ at my Etsy Shop!  

Wednesday, July 27, 2011

See The Maine Reef on the Fryeburg Fair Facebook Page!

Check out the posting on the Fryeburg Fair Facebook page showing the link to this project, The Fiber Center's newest Fiber Art exhibition scheduled to show at the fair in 2012!

The Maine Crochet Reef project is looking for folks to create pieces to be included in the final exhibition. If you crochet, knit, felt or do any other fiber art form and would like to become a part of this amazing project it's easy! Simply create a piece and bring it to the Fiber Center when you come to the fair in October or mail it in to us.

Even beginner crocheters can easily make pieces to contribute. If you can chain stitch and single crochet, that's all you really need to make a piece. Don't worry about mistakes! There are no mistakes in this project. So long as the piece holds together your contribution is important and will be combined with many others to create the whole.

 If you would like to learn how to crochet or are looking for patterns, visit our pattern page for a link to easy crochet instructions from Lion brand along with patterns to get you going. Maybe you prefer to create something of your own design, either way, all items with few exceptions will be included.

Go to the FAQ page to see the few guidelines for creating submissions and begin! We look forward to the many contributions that will make up this amazing installation!

Don't miss out! You can become a part of the Maine Crochet Coral Reef project at Fryeburg Fair.

Begin creating today!

Saturday, July 16, 2011

Start a New Crochet Coral Reef Group!

As we continue to develop the Maine Crochet Coral Reef project we are looking for people to start creative social groups to work on the Reef project. We have two groups so far who are just starting up.

Karen Cornell, staff member of the Fiber Center at the Fryeburg Fair lives in Anson, Maine and has a group of enthusiastic ladies who have begun creating reef pieces. Karen is spearheading that rural group and working out the details. They expect to meet one on one and occasionally as a group. Karen will act as teacher and mentor and will collect the work as it is completed.

Ann Thompson our liaison and important project networker is getting a group going in the S Portland area. Several of her acquaintances through MCA and other associations are excited about the project.

If you would like to join either of these groups or would like to start a group of your own, please let us know.

Get involved and have fun!